Media How-to
How to Remove Background Noise from Video on Windows
Remove background noise from video on Windows: cut hum, fan and room noise without touching picture quality, with a free offline app or Audacity.

On this page
To remove background noise from video on Windows, open the video in a noise reduction tool, let it learn the noise from a quiet moment, and apply a high-pass filter for hum plus spectral noise reduction for hiss and fans. Video Noise Reducer does this offline in one step and copies the picture untouched. With Audacity, export the audio, clean it with Noise Reduction, and put it back.
A great clip ruined by an air conditioner's hum, a laptop fan, traffic or the hiss of a cheap microphone. Viewers forgive soft video but not bad audio. This guide shows how to remove background noise from video on Windows, without re-encoding the picture or uploading your footage, and how to avoid the noise next time.
Know Your Noise
| Noise | Sounds like | Best tool |
|---|---|---|
| Electrical hum | Low 50/60 Hz buzz | High-pass filter |
| Rumble | Wind, traffic, desk bumps, AC | High-pass filter |
| Steady hiss and fans | Constant "shhh" | Spectral noise reduction |
| Room noise between words | Background audible in pauses | Noise gate |
| Sudden sounds | Dog barks, door slams | Manual editing (cut or lower) |
Steady noise is easy to remove; sudden, changing noise is hard for any tool.
Method 1: Video Noise Reducer (Offline, One Step)
-
Open your video
Install Video Noise Reducer from the Microsoft Store and open your clip. MP4, MKV, MOV, AVI, WebM and more than 15 formats work.
-
Start with the defaults
The app runs three stages: a high-pass filter (80 Hz by default) for hum and rumble, spectral subtraction that learns the noise from quiet parts, and a soft gate that cleans pauses smoothly.
-
Fine-tune if needed
Raise spectral strength for more cleanup, raise the floor if the voice starts to sound "watery", and adjust the gate threshold for quieter pauses. The built-in guide explains each setting.
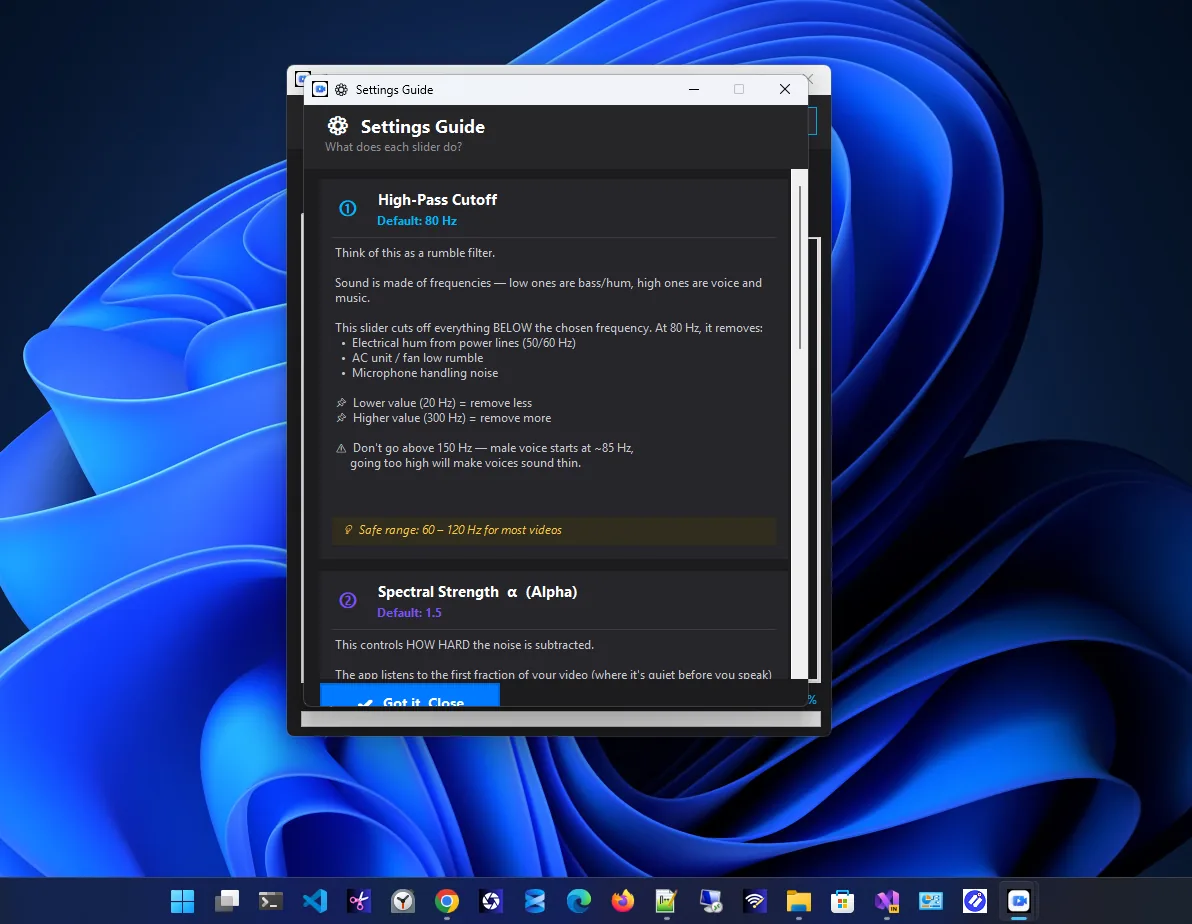
Each filter is explained in the app, with safe default values. -
Export
Save the cleaned video. The picture is copied bit for bit, so there is no quality loss; only the audio is processed. You can also export just the audio as MP3, WAV, AAC, FLAC or OGG.
Method 2: Audacity (Free, Manual)
-
Get the audio out
Import the video into Audacity (it needs the free FFmpeg library), or export the audio from your video editor.
-
Capture a noise profile
Select a second or two of pure background noise, then choose Effect, Noise Removal and Repair, Noise Reduction, Get Noise Profile.
-
Apply to the whole track
Select all (Ctrl + A), open Noise Reduction again and apply. Start with 12 dB; higher values remove more but make voices sound metallic.
-
Put it back
Export as WAV and replace the original audio in your video editor, keeping it in sync.
How Not to Overdo It
- Remove noise until it is quiet, not until it is gone; over-processing creates warbling "musical noise".
- Compare before and after on headphones and on laptop speakers.
- Leave a little room tone; total silence between words sounds unnatural.
- Apply hum removal first, then broadband noise reduction.
Record Cleaner Audio Next Time
- Put the microphone close to the speaker: half the distance means much less room noise.
- Turn off fans, AC and fridges nearby while recording.
- Use soft furnishings; bare rooms echo.
- Record 5 seconds of silence at the start, which gives noise tools a clean profile.
- For live calls, Windows' microphone settings include voice clarity or audio enhancements on many PCs.
More Media Guides
Making a tutorial? See how to take a screenshot on Windows 11. Preparing thumbnails or images for upload? See how to resize multiple images at once.
Check the Result Properly
Listen to the cleaned audio three ways: on headphones to hear artifacts, on laptop speakers to judge clarity, and on a phone, which is how many viewers will hear it. Pay attention to the start and end of words; if they sound clipped, lower the gate threshold. If voices sound thin, lower the high-pass cutoff. Keep the original file until you are happy, so you can try again with different settings.
For a series of videos recorded in the same room, note the settings that worked best and reuse them. Consistent audio across episodes sounds more professional than perfectly clean audio in one and noisy audio in the next.
FAQ
Can I remove background noise without losing video quality?
Yes. Tools that only process the audio and copy the video stream, like Video Noise Reducer, leave the picture untouched.
Can I remove wind noise?
Partly. A high-pass filter removes the low rumble; strong gusts that cover the voice cannot be fully fixed.
Can I remove music or other voices?
Not with noise reduction, which targets steady noise. Separating voices from music needs AI stem separation tools.
Is it free?
Both methods here are free, and both run offline on your PC.
Conclusion
Identify the noise, cut hum with a high-pass filter and steady noise with spectral reduction, and stop before voices sound processed. A one-step offline tool keeps the picture untouched; Audacity gives manual control. For more tools, see all media apps for Windows.