Media How-to
Reduce Image Size Without Losing Quality
Reduce image size without losing quality on Windows: resize to the right pixels, pick JPG, PNG or WebP, use 80-85% quality and batch-shrink photos.

On this page
To reduce image size without visible quality loss, first resize the image to the pixel size you actually need (for example 1920 px wide for screens, 1200 px for web, 1080 px for social media), then save as JPG or WebP at 80–85% quality. A 12 MB phone photo usually shrinks to 300–800 KB and looks the same on screen. Keep PNG for screenshots and graphics with text, and always keep the original file.
Time: 1–5 minutes · Cost: free · Works on: Windows 11 and Windows 10
An email bounces because the attachment is too big, a website form rejects photos over 2 MB, or your blog loads slowly. You need smaller images but do not want them blurry or blocky. This guide explains how to reduce image size without losing quality you can see, with the right dimensions, format and settings, and how to do it for one photo or hundreds at once.
Two Ways to Make an Image Smaller
- Resize (fewer pixels): a phone photo is 4000–8000 pixels wide, far more than any screen shows. Scaling to 1920 px removes pixels nobody sees and cuts the file size by 75–90%.
- Compress (smarter storage): JPG and WebP throw away detail the eye barely notices. At 80–85% quality the difference is invisible on screen; below about 60% blocks and halos appear.
Doing both gives the biggest savings. "Lossless" compression alone (for example optimising a PNG) saves only 10–30%.
Recommended Sizes
| Use | Width (long edge) | Target file size |
|---|---|---|
| Email attachment | 1600–2048 px | 300 KB – 1 MB |
| Website or blog image | 1200–1600 px | 80–250 KB |
| Instagram / Facebook post | 1080 px | under 1 MB |
| Online form (ID photo, application) | As specified, often 600–1200 px | Often under 200 KB–2 MB |
| Full-screen wallpaper | Your screen width (1920–3840 px) | 1–3 MB |
| Printing | Do not shrink; keep the original | — |
Choose the Right Format
| Format | Best for | Notes |
|---|---|---|
| JPG | Photos | Works everywhere; use 80–85% quality |
| WebP | Photos and graphics on the web | 25–35% smaller than JPG at the same quality |
| PNG | Screenshots, logos, text, transparency | Lossless; large for photos |
| HEIC | iPhone photos | Small, but not accepted by many websites; convert to JPG to share |
Method 1: Image Resizer App (One or Many Photos)
-
Add your photos
Open Image Resizer App and add one image or a whole folder.
-
Pick a preset or size
Choose a preset or type the width you need from the table above, keeping the aspect ratio locked.
-
Export
Export to a new folder so originals stay untouched. The history shows each file's new size and format.
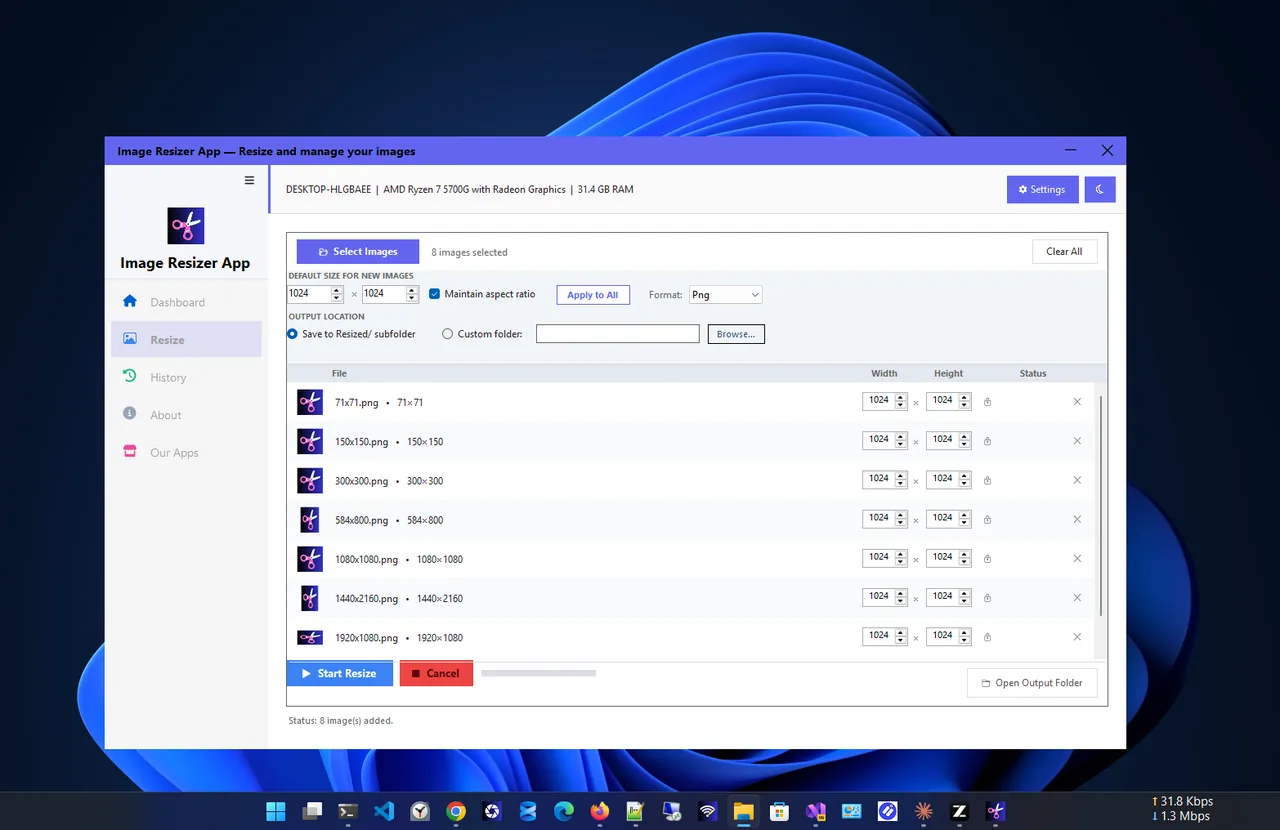
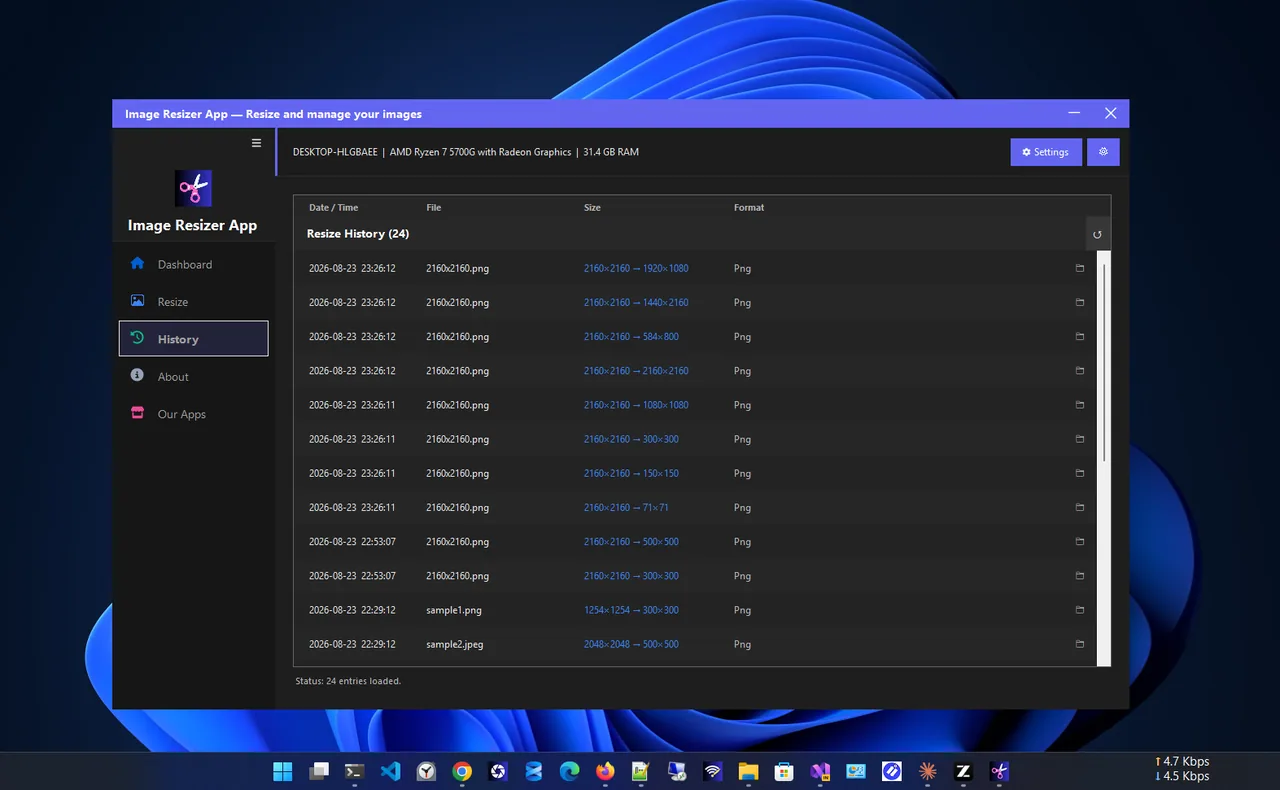
For whole folders, see how to resize multiple images at once.
Method 2: Windows Photos or Paint (Single Image)
- Photos: open the image, click ... > Resize image, choose a size or enter custom pixels and a quality level, and save a copy.
- Paint: Home > Resize > Pixels, tick Maintain aspect ratio, enter the width, then File > Save as > JPEG.
Tips to Keep Quality
- Resize once from the original. Repeatedly re-saving JPGs adds artefacts each time.
- Never upscale. Making a small image bigger only adds blur.
- Check at 100% zoom on the faces and text that matter before sending.
- Strip metadata if privacy matters; EXIF can include location.
For documents full of images, shrinking the PDF is often easier: see compress a PDF without losing quality, or combine resized photos with convert JPG to PDF on Windows.
Reduce Image Size Without Losing Quality in Bulk
For hundreds of holiday photos or product images, resize in one batch with the same settings so every file is consistent. Keep the originals in a separate folder, export to a new one, and spot-check a few images at 100% zoom before deleting anything. Name the output folder by size (for example "web-1600") so you know what each copy is for.
Reduce Image Size for Email
Most email services limit attachments to 20–25 MB, and many inboxes struggle with large messages. For ten photos, resize each to about 1600–2048 px and the total is usually under 10 MB. Outlook on Windows can also resize images for you when attaching: File > Info > "Resize large images when I send this message". For more than a few dozen photos, share a cloud link instead.
FAQ
How do I reduce a photo to under 100 KB?
Resize to about 800–1000 px wide and save as JPG at 70–80% quality. Most photos land between 60 and 150 KB.
Does resizing reduce quality?
Downsizing removes detail, but at screen sizes it is not visible. Quality loss shows only if you zoom in far or print large.
Is WebP better than JPG?
For the web, yes: smaller files at the same quality. For sending to people or older software, JPG is safer.
Why is my PNG screenshot so large?
PNG is lossless. For screenshots with photos in them, JPG or WebP is much smaller; for text-only screenshots, PNG is best.
Conclusion
Resize to the pixels you need, save photos as JPG or WebP at 80–85%, and keep PNG for text and graphics. That cuts file sizes by 90% with no visible difference. Always keep originals. Explore more media apps for Windows 11.